
Laravel Spark is a commercial product based on Laravel made by the Laravel's creator Taylor Ottwel. The goal of it is to help you to create a billing solution in no time. The installation is easy and it works very well with Stripe. If you don't need to modify anything the installation on the server is the end of work. If you need to change something... well it's another story. The documentation is OK but basic. And if you count on the support of the product creators (it's a commercial product after all), well... you can keep counting... My experience with them is rather poor - they are either not responding or denying their help (probably you will hear that what you want is impossible). Spark is not a bad product though and it can deliver a lot of solutions for you very quickly and with low workload. That's why I use it.
The Spark provides us whit basic registration form. If your paying customer is a company and they need an invoice after log in they need to go and feel extra data in their Settings in Invoices submenu (https://www.yoursitename.com/settings#/invoices). This is at least 3 clicks and it's not obvious to the customers it's there at all. Anyway none of the over 500 customers of my client I made the Spark based subscription system was able to find it on their own. They just complained that the data on the invoice is wrong. Changing this data for every new customer, calling them, confirming, resendind the invoices, apologise etc - this is not the most productive way of working, is it?
So wouldn't it be cool to have an extra field on the registering form so the new customer could fill his company data rigth while registering? It's impossible as the support of Spark says but I deceied to dig deeper. It turned out that Spark to store the customer's company data use extra_billing_information column in users table. And because Spark under the hood uses Laravel Cashier it is accessible like this:
auth()->()user->extra_billing_information
There we go! The only thing we have to do is to add this field to the registering form so this information is saved while the user record is created and that's it.
Let's do it step by step.
I assume you have the Laravel Spark installed and working.
First we need to modify the view.
Let's add a new "information" form field to the /resources/views/vendor/spark/auth/register-common-form.blade.php file. I placed this new field under the existing "password confirmation" field:
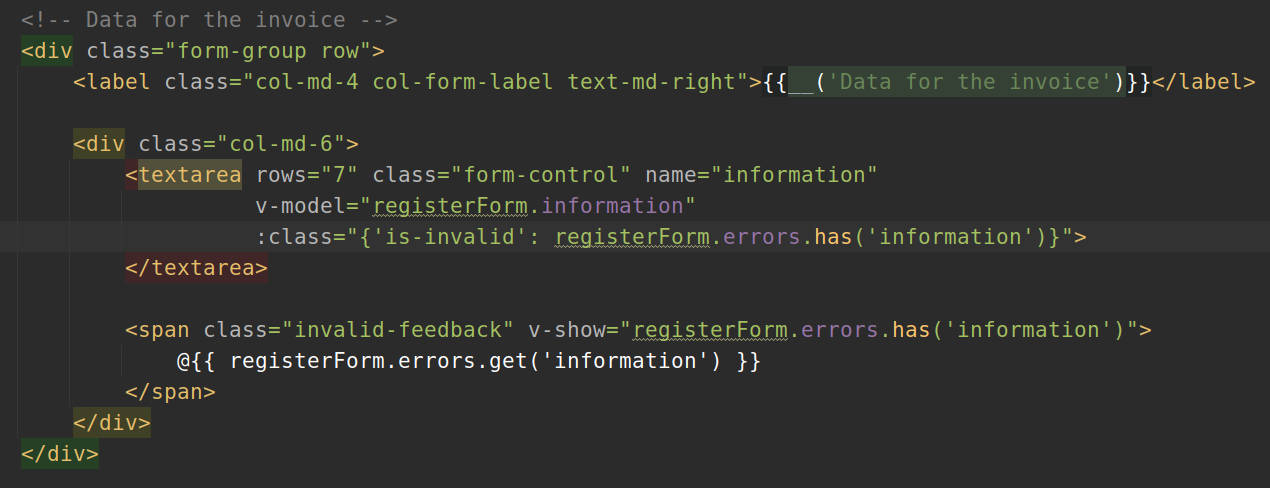
Remember that you should edit files only in /resources/views/vendor/spark directory not the source files as they can be overwritten with Spark updates.
Changing the javascript.
Because Laravel Spark uses Vuejs we need to extend the /resources/js/app.js file to include our new "information" fild data. In the /resources/js/app.js file, we need toadd the following lines of code just before the call to new Vue:
Spark.forms.register = {
    information: ''
};

var app = new Vue({
    mixins: [require('spark')]
});
Save the data.
The last thing we need to do is to save the data. Because we modified what we are saving the Spark way is to add createUsersWith method to the SparkServiceProvider inside the booted() method like so:
    /**
     * Finish configuring Spark for the application.
     *
     * @return void
     */
    public function booted()
    {
       ...

	Spark::createUsersWith(function ($request) {
            $user = Spark::user();

            $data = $request->all();

            $user->forceFill([
                'name' => $data['name'],
                'email' => $data['email'],
                'extra_billing_information' => $data['information'],
                'password' => bcrypt($data['password']),
            ])->save();

            return $user;
      }
What does the magic is this part: 'extra_billing_information' => $data['information'] - it just fills the extra_billing_information column of the user record.
What left is recompile the javascript so in the terminal we need to execute
npm run production
and we shoud have the thing working.
If you need to validate the entered data the good explanation ypu can find in the Laravel Spark documentation here: https://spark.laravel.com/docs/11.0/adding-registration-fields#validation-and-storage.
